Saturday, 30 March 2013

You Crack Me Up Peeps Treat

Hello, Stampers! It has been awhile since I made something to show you. I have been sewing. I made a bridesmaid's dress and will be making 2 more of the same dress. There was no pattern for me to follow except a picture to look at. It was a challenge but the first one turned out almost like it. I can't wait to make the other 2 dresses.


I took a little time from sewing and made this little package for my little Master Clubbers ages 4-5. I'm in charge of them. Master Clubs is a club where children from ages 4-12 come on Wednesday night church to learn more about Jesus. It is a fun club and I love those little children.

The little chicks was not coloured so the kids can colour it themselves. I love the sentiment "you crack me up." It was prefect for them. The children do crack me up sometime.


Thank you for stopping by! Have a nice Resurrection Sunday!

"Train up a child in the way he should go: and when he is old, he will not depart from it."
Proverbs 22:6


Deanna

Wednesday, 20 March 2013

Welcome Little One Card and Crochet Hat

Hello, stampers! I made a baby card and a crocheted hat for a baby soon to be born. I used multi colour yarn for the hat. I really like how it turned out.


I used the retired Bundle of Joy stamp set to make the card. It was last minute so the card was a simple one.

Thank you for visiting my blog today! Happy stamping!

Deanna

Friday, 15 March 2013

NSR: Kettle Corn Popcorn Recipe

Hello, stampers! Hope you are having a good week so far. I was sick last week. I got the flu round 3. How fun is that? sigh! Don't have nay creative stuff to show you.

Many of you have asked for the kettle corn recipe. Here it is.


Disclaimer here: My husband uses a popcorn maker called "Snack Maker" made by Schneider's. You can use any pot that is similar in design. It's really a pot with a lid that has a turning handle. The whole idea is to have someway of rotating the popcorn so that it doesn't burn while popping. It is possible to use a regular large pot and shaking it vigorously every few seconds but, the quality of the popcorn will be poor.


Ingredients:
1/4 cup vegetable oil
1/2 cup popcorn kernels
1/3 cup sugar
3/4 teaspoon salt


Directions:
1  Heat the pot at medium.
2  Add the oil and heat a minute
3  Add popcorn, give it a few shakes to distribute evenly and watch it sizzle.
4  Add the sugar and watch the sizzle die down. Secure lid on pot.
5  Wait for the kernels to start popping. Now slowly, but not too slowly turn the handle to rotate the popping corn. Thus keeping the popped corn from staying in one place too long to avoid burning. Let pop until popping slows to 1 pop for every 2-3 seconds. Remove from heat source.
6  Immediately, empty popped corn into large bowl. It will be sticky. Now sprinkle in the salt and toss a few times to distribute the salt. Wait for it to cool before eating. The popped corn will stick together when hot. After cooling it can be separated by tossing a few times. Now enjoy!


Deanna

Saturday, 2 March 2013

Handmade Boxes, Homemade Kettle Corn

Do you love popcorn? I sure do! My husband made wonderful and tasty kettle corn popcorn that I love so much. Couldn't get enough of it the first time he made it.

Today I'm showing you this awesome box my husband made. He filled the boxes with popcorn and will be giving as birthday presents.


 I helped stamp the top of the boxes and made the tags to go with the box. Very simple look.


Punched a hole to each tag and tied them with twine. The boxes are not tape together so the twine helped hold the boxes together. Not taping the boxes down helps us store them better and ready to be use when we need them.

Thank you for stopping by today! Happy Stamping!

"O taste and see that the LORD is good: blessed is the man that trusteth in him."
Psalm 34:8

Deanna

Friday, 22 February 2013

Feeling Sentimental Trio

Happy Friday everyone! I made some thank you cards using the Feeling Sentimental stamp set from the Stampin'Up! SAB catalogue. Love it! When I saw this set I knew I had to have it. And I got this set for FREE. Yay!


Cute bicycle! I always wonder how people back in the old days was able ride it.


I love the phone booth stamp. It reminds me of the show Doctor Who. This one is just a normal phone booth but the one in the show is the police call box.


Stampin'Up! supplies:
stamps- feeling sentimental, wedding sweet
papers- basic grey, basic black, whisper white
ink- basic black
accessories- ribbon, small oval, large oval


Thank you for stopping by! Happy Stamping!

Deanna

Saturday, 16 February 2013

Wonderful Mother Altered Note Books


Hi, everyone! Good day! I made these two books this past week. I altered two note books for the bride-to-be. She is giving one to her mother and one to her mother-in-law. That is so sweet of her.


This book above I stamped the Baroque stamp in a lighter brown colour for the background of the cover. Tied a long tulle up and down the middle of the cover.


The cover was decorated in red and pink and a flower at the top.


For the this one above I stamped the background in a darker brown colour.


This cover was decorated in blue with a flower at the top. This one is my favourite because it is blue. I like anything blue.


Thank you for your visit today! Happy stamping!

"Honour thy father and thy mother..."
Exodus 20:12

Deanna

Wednesday, 13 February 2013

Secret Garden Thank You Cards

Hello, stampers! Hope you are having a great week so far. Tomorrow is Valentine's Day. What are you doing for Valentine's Day? My husband and I are going to a Couples' Banquet at church. No need to wait in line like at a restaurant. Seating are guaranteed.

I made a whole bunch of this card yesterday. I'm behind on my "thank yous" about a month. I miscalculate how many I need to make and now I have to make some more.


I used the Secret Garden stamp set that can be found in the Spring Mini Catalogue. There is a framelit die that comes with it making it easier to cut the flower out than cutting them by hand. Love it! No more cutting by hand for me.

Thank you for stopping by! Happy stamping!


Deanna

Saturday, 9 February 2013

Hugs and Kiss Valentine Card


Hey, stampers! Happy Saturday!  I got sometime to stamp and I made a card with the left over glitter paper from the previous project. I die cut a heart from the glitter paper using the Heart Collection Framelits.

I added the Paper Doily Sizzilit die piece at the bottom of the card. It is subtle but it is there. Now that I think of it I should have stamp the background image stamp first then glue the doily to the card.


The sentiment was stamped onto Pink Pirouette card stock and then punched out by using the Petite Curly Label punch. Such a cute punch! It measures 5/8" and 3/4". Very small punch but I like it. I like to mount my images onto another colour so I adhere the sentiment piece onto the Regal Rose card stock and then cut it out.

Thank you for visiting today! Happy long weekend to people living in BC. It is our first Family Day stat holiday. Yippie! We finally have a stat holiday in February!


Supplies: all SU! products
stamps- all holidays, french script
papers- pink pirouette, whisper white, glitter paper, regal rose, cherry cobbler
inks- pink pirouette, real red
accessories- tulle, petite curly label punch, hearts collection framelits die, paper doily sizzlit die, ribbon


"We love him, because he first loved us." 
1 John 4:19

Deanna

Tuesday, 5 February 2013

Valentine Heart Card

Hello, everyone! Hope you are having a good day so far. Wow! It is already February and I have not create much Valentine stuff this year. My plan was to make 14 things to that'll lead up to Valentine's Day and show but things just didn't go as the way I've planned. I was sick most of the time in January and that's no fun.


Here is a Valentine card I made last night. It is a heart shape card and is mount onto a heart shape glittery paper. I use the Heart Framelits Die to cut the card and the glittery paper. The card will not sit on the table by itself because the glittery heart is flat. It'll have to be prop onto something to make it stand. But is look nice the way it is.


Thank you for visiting today!

"My beloved is mine, and I am his: ..."
Song of Solomon 2:16

Deanna

Friday, 1 February 2013

Bridal Shower Advice/Wishes Book

Hello, stampers! Good day! I made this book for a sweet lady at church for her Bridal Shower. She's getting marry next month. It is an advice/wishes book.

For the cover I put their wedding invitation on the front. Something I've never done before. I think it is cute because of the cute couple on the front. I made the book in her wedding colour. What a fun colour to work with! It took me a few days to make this but if you count the time put together it wasn't that long.


The inside of the book. The envelopes are closed in this photo. I made 2 small envelopes using the Scallop Envelope Bigz Die and the bigger envelope was made using the Simply Scored Diagonal Plate. My first time using the Diagonal Plate. It was easy to use.


Envelopes opened.


I made little cards in whisper white card stock to go inside each envelopes. I stamped the corner of each card stock to give it a fun look and then punch the corners of each cards. People can write on it and then they are tuck inside each envelope.


Here is a closer look at the small envelope when it is closed. This is a really neat way to keep the envelope close with the fuzz of tying the ribbon. I should have made the big envelope the same way. Each envelope were punched with a hole on the flap and a hole on the bottom piece with the Slot punch.


Here is closer look at the envelope open.You can see the Slot punched holes.


Then I punch a piece of card stock using the Word Window punch. Add a flower and rhinestone to it. I'll call this punched out piece a key. Not sure what else to call it. If you look at the photo of the closed envelope you'll see that the key just slide through the two Slot punch holes on the envelope and it keep it close. Very easy to access the card inside.


Thank you for stopping by! Have a good day!


Supplies: materials are Stampin'Up
stamp- wedding sweet
papers- whisper white, tempting turquoise, pacific point
ink- tempting turquoise
accessories- rhinestone, flower trio punch, word window punch, slot punch, eyelet border punch, scallop envelope bigz die, simply scored diagonal plate


"But from the beginning of the creation God made them male and female."
Mark 10:6


 Deanna


Saturday, 26 January 2013

Wedding Favour Tags

Hello, everyone! I got to stamp with a friend the other day. We made over a hundred of wedding favour tags for her wedding coming up in March. We had a blast and I really enjoyed her company. The favours are so cute. They are little salt and pepper shaker set. I think it is a cute gift and I love the colour she chose.

Supplies:
stamps- wedding sweet, vintage labels
papers- whisper white, tempting turquoise 
inks- tempting turquoise
accessories- flower trio punch, rhinestones, curly label punch

Thank you for stopping by!


Deanna

Friday, 25 January 2013

Lighthouse Birthday Card

Hello, stampers! It seems like forever since I stamp but it is only been a week and half. I got hit with another flu. This one lasts 2 days leaving me weak and not able perform 100%.

I'm happy that I'm able to stamp today. I made a birthday card for a friend. He'll be 30 this Sunday. Not sure what he likes. Hope he likes lighthouse.

Supplies:
stamps- uncharted territory, vintage labels
papers- whisper white, pacific point, real red, crumb cake, designer paper
inks- chocolate chips, real red, pacific point
accessories- markers, curly label punch


"Thy word is a lamp unto my feet, and a light unto my path."
Psalms 119:105


Deanna


Monday, 14 January 2013

Money Envelope Tutorial

Hello, everyone! I took pictures for this tutorial last week and did not get a chance to upload them then I got sick. My whole family got the flu. Terrible! I finally got my energy back.

Thought some of you might like to make the money envelope I've been talking during Christmas. I made this a Valentine one.


I use card stock for the tutorial. Pattern paper is too busy to see the score lines. You are welcome to use pattern paper when you make yours.


1.Cut a piece of card stock at 7-1/2" x 8-1/2". On the 7-1/2" side score at 3-1/2" and at 7". Rotate the paper counter clockwise. On the 8-1/2" side score at  1-1/4" and at 8". The lines are drawn in in the photo are for instruction purpose only.


2.Cut off the pieces as shown in the photo. Discard the cut out pieces. You'll have 1/2" flap at the bottom and the side and 1-1/4" flap for the opening.


3.Trim slightly on the part without the flaps for easy folding.


4.Stamp the envelope before assembling if using card stock or leave it plain.


5.Punch half a circle at the top on the part without the flap. This help for easy access of stuff out of the envelope.


6.Use a corner rounder punch and round off the corners on the 1-1/4" flap.


7.Turn the paper to the inside and add sticky strip to the 1/2" flaps at the bottom and side.


8.Adhere the envelope together.


9.For the closure of the flap at the top, I stamp a scallop circle image and mount it onto envelope but not onto the flap.


10.Decorate the front of the envelope.


You can put money in the envelope or


Add some candies to it.


Hope you enjoy the tutorial. Tell me what you think.


Deanna

Friday, 4 January 2013

Just For You Tag

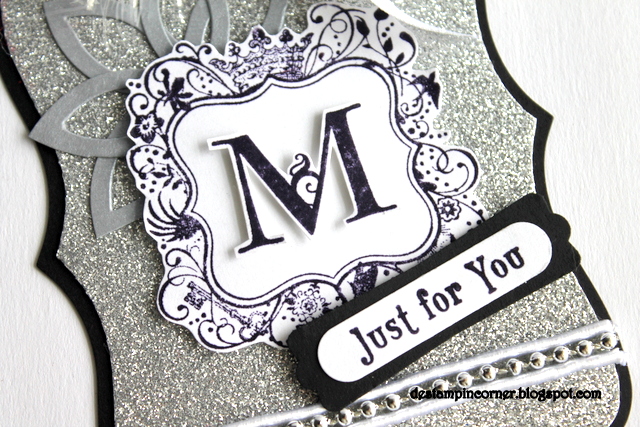
Greetings my blog friends! It's already Friday. Time sure goes by fast when you are having fun. Back to school for my kids yesterday. They had an early holiday break so an early back to school day. It was hard for me to wake up this morning. I had to drag myself out of bed. I help out at the school today.


I made this tag for Martin for Christmas. His Christmas gift. It is like a ticket for a trip for his birthday. It is a surprise place where are going. He had to wait until  August to find out. I know. That was mean of me to make him wait but he was fine with it I think. I know he'll love it when the time comes.


Supplies:
stamps- lovely letters alphabets, elementary elegance
papers- whisper white, silver glitter paper, basic black, brush silver
ink- basic black
accessories- silver cord, 1/8" hand held punch, word window punch, modern label punch, top note die, lattice bigz die, taffeta ribbon


"But they that wait upon the Lord shall renew their strength; they shall mount up with wings as eagles; they shall run, and not be weary; and they shall walk, and not faint."
Isaiah 40:31


Deanna

Thursday, 3 January 2013

NSR: Update On Jeff

Not stamping related post. Back in December I talked a little about Jeff. Now I want to up date you on Jeff's cancer. Praise the Lord for Jeff is now cancer free. He still have 1 more chemo treatment then he is done. You can read more about it here over at his blog.


Wednesday, 2 January 2013

Thank You Cards

Happy New Year everyone! Did you have a wonderful Christmas? Mine was the same every year except last year's. Christmas eve at the in laws side and on Christmas day for my side. For both sides there were a few relatives who couldn't make it to the parties. Some had to work and some decided to go somewhere else. It was a pretty quiet Christmas.

I needed some "thank you" cards so I made them in white and all shades of blues that I have. Snowflakes are my favourite. I made my Christmas cards in red snowflakes and now I made the "thank you" cards in blue snowflakes. I never get tired of snowflakes.

Supplies:
stamps- Snowflakes, Curly Cute
papers- whisper white, bajah breeze, pacific point
inks- bajah breeze, night of navy, pacific point
accessories- midnight muse satin stitched ribbon, slot punch, 1" and 1-1/4" circle punches, northern flurry embossing folder, apothecary accents framelits


Deanna

Saturday, 29 December 2012

From Christmas to Calvary Video

From Christmas to Calvary from Greater Vancouver Baptist Church on Vimeo.


A video of the church choir performing the Christmas Musical "From Christmas to Calvary".