Hello, everyone! Happy Friday! As promised here is the basket tutorial.
 You'll need two 4-1/4" x 8-1/2" piece of cardstock. Use 1 piece of 4-1/4" x 8-1/2" cardstock and cut the basket from the Basket & Blooms die using the Big Shot. I've already cut the basket shown in the picture above. Set the basket aside.
 Put the other 4-1/4" x 8-1/2" piece of cardstock in the paper trimmer and score the 2 long sides at 3/8". Turn the paper on the short side and score at 2-3/4" and 5-3/4".
 The above picture show all the score lines. Cut slits on the 2 middle score lines on both sides. Add sticky strip on the four side flaps. This piece of cardstock is the middle of the basket. Set this piece aside. The pencil is just for the camra to be able to focus on something.
 Trim at the dotted line on the 2 basket pieces and add sticky strips at the bottom of both basket pieces. These pieces are the 2 sides of the basket.
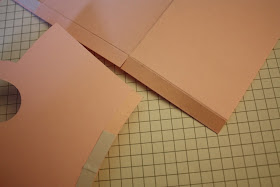
 Remove one sticky strip at a time on the middle piece of carstock and one side of the basket piece as shown above.
 This is how it looks like when 2 basket sides are attached to the middle piece.
 Turn it over and fold the two middle flaps way down so it will be out of the way when you attach the other side of basket sides to the middle piece.
 This is how it looks like before you attach the other sides of the basket sides to the middle piece.
 This is how the bottom middle flaps of the middle piece should look like before it is attach.
 Attach the 2 middle flaps of the middle piece to the basket side pieces. You're done!
 I add paper flowers to the 2 sides of the basket. I've seen this flower made on other blogs but when I saw it on Rita's blog I just have to try to make one myself.
 Here is a picture of the basket again. Hope you enjoy the tutorial and have fun making it! If you have any questions leave a comment and I'll answer when I can.
Happy Stamping!
Deanna

Cute! Thanks so much for the tutorial. <3
ReplyDeleteHi Deanna,
ReplyDeleteI have something for you on my blog.
Happy New Year to you and your family!
Great project & tutorial & a fabulous way to store ribbon! I'm putting this one on my to do list, thanks so much for making the tutorial!
ReplyDeletewow! fantastic! I don't have that die...but now it's on my list! :)
ReplyDelete