Showing posts with label Wedding. Show all posts

Tuesday, 12 August 2014

Butterfly Wedding Card

A monochromatic wedding card for a couple getting marry. The bride favourite colour is green so this is the card I made for them.


I died cut the heart using 2 hearts from the Hearts Collection Framelits Die. I put the small heart in the middle of the bigger heart and cut them out at the same time.


The butterfly was from the Simple Friendship stamp set. I was debating if I should have 2 butterflies on this card but I ended up leaving it the way it is. I love the line of pearls at the bottom of the card. Hope calls them doggy paws. If you cut the big pearl with some small pearls that's what you'll get. She's funny. She sees things that no one sees.


Thank you for stopping by! Happy Stamping!

Deanna

Thursday, 3 July 2014

Love Wedding Card

Hello stampers! This card is for a couple getting marry this Saturday. So many weddings this year of the people I know.

Just a simple wedding card for the couple. The bride like it simple and I made it in her favourite colour, navy blue. The picture doesn't show up as that colour. I helped altered one of the bridesmaid's dress and made a very, very simple veil for the bride. I think I'm done making or alter for weddings for now. I can start crafting! Yay!

Thank you for stopping by! Happy Stamping!

Deanna

Tuesday, 24 June 2014

Wedding Favours

Few! All done! Over 200 of these milk cartons for a wedding this weekend. Normally it doesn't take me long to make these but it did. Couldn't do much at a time because my right fingers was in pain. The pain was not from making these. The pain might be from the whiplash back in November. The whiplash does funny things to my body. The doctor can not figure out what is causing the pain so he sends me to see a specialist. I'm seeing one this Thursday. Can't wait to find out what is causing the pain.


The colours for the wedding are yellow and blue. Nice combinations. I love it!


Thank you for stopping by! Happy Stamping!

Deanna

Monday, 28 April 2014

Wedding Day Card

Wedding card for a friend. She's getting marry this summer. I used the Flower Garden embossing Folder for the flower on the side. I added pearls to the flowers. Not sure if you can see the pearls on the flowers.


 My new favourite bow look. I like the fullness look to it. I added a pearl to the bow to make it pretty.

Thank you for stopping by! Happy Stamping!

Deanna


Tuesday, 25 March 2014

Wedding Favour Milk Carton Boxes

Hello stampers! I made some samples for a friend to look at. She want me to help her make some wedding favour boxes. She chose milk carton boxes and the wedding colour will be blue. My favourite colour so it was easy to do.


I did the circle scallop design with 2 hearts in the circle for this one. The lily of the valley is stamp in Soft Suede colour.


This one is a scallop square with the word love on it. I stamp the lily of the valley a little lower than the one above and also stamp it in Soft Suede ink.


This one is different from the 2 above. I stamp the flowers from the Elements of Style stamp set in Bashful Blue ink and wrap a nice lacy blue card stock around the milk carton.

I hope she doesn't have a  hard time picking which one to use because I can't decide which one is better. I love all 3 of them.

Thank you for visiting today! Happy Stamping!

Deanna

Friday, 1 February 2013

Bridal Shower Advice/Wishes Book

Hello, stampers! Good day! I made this book for a sweet lady at church for her Bridal Shower. She's getting marry next month. It is an advice/wishes book.

For the cover I put their wedding invitation on the front. Something I've never done before. I think it is cute because of the cute couple on the front. I made the book in her wedding colour. What a fun colour to work with! It took me a few days to make this but if you count the time put together it wasn't that long.


The inside of the book. The envelopes are closed in this photo. I made 2 small envelopes using the Scallop Envelope Bigz Die and the bigger envelope was made using the Simply Scored Diagonal Plate. My first time using the Diagonal Plate. It was easy to use.


Envelopes opened.


I made little cards in whisper white card stock to go inside each envelopes. I stamped the corner of each card stock to give it a fun look and then punch the corners of each cards. People can write on it and then they are tuck inside each envelope.


Here is a closer look at the small envelope when it is closed. This is a really neat way to keep the envelope close with the fuzz of tying the ribbon. I should have made the big envelope the same way. Each envelope were punched with a hole on the flap and a hole on the bottom piece with the Slot punch.


Here is closer look at the envelope open.You can see the Slot punched holes.


Then I punch a piece of card stock using the Word Window punch. Add a flower and rhinestone to it. I'll call this punched out piece a key. Not sure what else to call it. If you look at the photo of the closed envelope you'll see that the key just slide through the two Slot punch holes on the envelope and it keep it close. Very easy to access the card inside.


Thank you for stopping by! Have a good day!


Supplies: materials are Stampin'Up
stamp- wedding sweet
papers- whisper white, tempting turquoise, pacific point
ink- tempting turquoise
accessories- rhinestone, flower trio punch, word window punch, slot punch, eyelet border punch, scallop envelope bigz die, simply scored diagonal plate


"But from the beginning of the creation God made them male and female."
Mark 10:6


 Deanna


Saturday, 26 January 2013

Wedding Favour Tags

Hello, everyone! I got to stamp with a friend the other day. We made over a hundred of wedding favour tags for her wedding coming up in March. We had a blast and I really enjoyed her company. The favours are so cute. They are little salt and pepper shaker set. I think it is a cute gift and I love the colour she chose.

Supplies:
stamps- wedding sweet, vintage labels
papers- whisper white, tempting turquoise 
inks- tempting turquoise
accessories- flower trio punch, rhinestones, curly label punch

Thank you for stopping by!


Deanna

Thursday, 19 July 2012

Wedding Day Wedding Card


Happy sunny Thursday everyone! It is such a beautiful today but too bad I had to stay inside to fix a big ball covering for Camp Y.E.S!


Here is a card I made awhile ago. Forgot to share it.

I made the flower using satin ribbon.  Something I learned to make long time ago.

Thank you for stopping by! Have a fabulous day!

Deanna


Wednesday, 13 June 2012

Wedding Essential

Guess what? I found the wedding creation pictures. They were in Martin's computer. I never thought they would be in his computer. I search and search on all the SD cards we got and they were not in any of the cards. I'm glad they were not deleted.

I made these wedding stuff for my brother's wedding. My SIL was very easy to work with. She's not picky at all. She's a sweetheart.


This is the picture of the menu card and a tag for the maraca. The tag said "stand and shake with all your might to see the groom and bride kiss tonight". I love it. It is so cute. One of my nephew really enjoy shaking the maracas.


This is the other side of the tag.


Colourful maracas favours.


This is the ring pillow I made long time ago for my wedding. I just changed the flower and ribbon to match their wedding colour.


This is the table number card.


This is the guest book. The frame piece on the book cover opens up and there is their picture inside.


Here is one of the pages inside the guest book. I put their wedding invitation and respond card in the guest book. Unfortunately I did not make the invitations.


Here is another page in the guest book. I added pictures to each pages and the guest can sign around them.

Hope you enjoy looking at the wedding stuff. I enjoy making them.

Thank you for visiting today.

Deanna

Saturday, 31 March 2012

Bridal Shower Gifts

Here is a matching card and box I made for my future sister-in-law's bridal shower. I can't wait to give them to her.


I made the box base with the white paper backing that comes with the Designer Series Paper packages. I stamped the box after I figure the measurement for the box. I stamped on the shiny side of the white paper thinking that it will look better but I used the wrong ink. I used classic ink instead of StazOn ink. The images keeps on smudging everytime I touch the box. sigh! Hope you learn a lesson here from my mistake.


The rose is made using an Ornament Punch. Here is a link to the rose if you are interest in making it.


The image on the card is from the She's All That stamp set (retired). Haven't use this set for a long time. i had to brush of the dust before I use it. ha,ha!


Here's what is inside the box. I crochet 2 dish towels and a tea towel topper. Something for her to use in her home.

I'm off to the bridal shower. Thank you for stopping by today!

"Who can find a virtuous woman? for her price is far above rubies."
Proverbs 31:1

Deanna

Thursday, 2 February 2012

Flowery Congratulations Wedding Card

Happy Thursday everyone!  Here is another wedding card I made using the Apothecary Art stamp set and the Labels Collection Framelit Die. Both items are in the Occasion Mini catalogue.


I used markers and a blender pen to colour the flowers and leaves. I added small half pearls to the four corners and two big half pearls around the word "congratulations" for some bling. I did the ribbon only a quarter of the way at the top left corner of the card. Very easy to do and uses less ribbon and looks nice at the same time.

Thank you for visiting today! Have great day!

"Rejoice in the Lord alway : and again I say, Rejoice."
Philippians 4:4

Deanna

Monday, 30 January 2012

Apothecary Art Congratulations Card

Happy Monday everyone!  I made this card for my MIL. She needed a wedding card for her friend's wedding. I can't use any black so this one is red and pink. So much like a Valentine card.


I used the new Apothecary Art stamp set from the Occasion Mini. Such a hard name to pronounce. I can not seem to say it right. I also used the new Labels Collection Framelit Die from the Occasion Mini. Oooh! I love this die. Oh! and the stamp set too of course. There are pearls on the flowers but you it is hard to see in the picture.

Thank you for stopping by!

"And said, For this cause shall a man leave father and mother, and shall cleave to his wife: and they two shall be one flesh?"
Matthew 19:5

Deanna

Tuesday, 21 June 2011

On Your Wedding Day

Hello everyone! I have been super busy trying to get my kids work scan and send them to the teacher. I'm almost done. Just need to make a few more adding on to pile of scans. So this post will be very short.

Anyway, here is a card I made for couple getting marry soon. Very simple card with flowers on it.

Thank you for visiting today! Have a wonderful day!

Happy Stamping!
Deanna

Wednesday, 27 April 2011

Another Wedding Card

Hi there! How's everyone doing? Are you tired of wedding cards yet? Well, here is another one. This one is an odd size card. Not my usual size card. My MIL requested a bigger wedding card and the biggest envelopes SU! sells is the 5-1/2" x 5-1/2".


I finally got my Fun Flowers Bigz L Die after a month. It was back order. I guess SU! didn't expect this die to be so popular. Love this die! The shape with the sentiment on it is the Top Note Die. I die cut the paper with the Top Note Die and then flip the paper around so that the long end is on the short end of the die and ran it through the Big Shot machine again.

Thank you for stopping by to visit my blog today! I really do appreciate it.

Happy Stamping!
Deanna

Tuesday, 26 April 2011

Wedding Day Card #2

Hello, everyone! Here is another wedding card I made. The pattern paper is the same as the first card I made.

Can you guess how I got the pink card stock shape for the sentiment? I used the pillow box die for the look. Somehow my die is different from the one in the catalogue. The two side inside flaps from my die are just 1/4" wide but the one in the catalogue are the full ones. hmm...I wonder why is that? Might have to call SU! about that.

Thank you for stopping by today! Have a great day!

Happy Stamping!
Deanna

Tuesday, 19 April 2011

Wedding Day Card

Happy Monday! Hope you all had a good long Easter weekend.

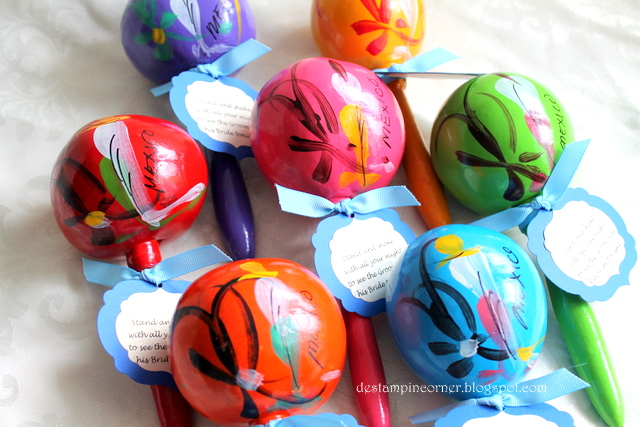
I need lots of wedding cards this coming season. Lots of people I know are getting marry. So I made a few wedding cards last week. I made other different ones for friends who need wedding cards too.


Supplies:
stamp- Occasional Quotes
papers- whisper white, vellum, Springtime Vintage
ink- chocolate chip
Access.- satin ribbon, brad, 2-3/8" scallop circle punch, 1-3/4" circle punch, vintage wall embossing folder, sponge

Happy Stamping!
Deanna

Monday, 21 March 2011

Butterflies Congratulations

Happy Monday everyone! Today is a very wet day. I'm glad I'm a SAHM. Don't have to go out to work in this rainy day. All cozy inside and do some crafting.

Here is a card I made for the Bridal Shower tomorrow. Very simple one. There is no special technique or layout to it. I might make an album for the bride but I have no idea what her likes or dislikes or favourite colour. I only know her fiance. He's the pastor's son. Anyway, will have to get acquainted with her when they get marry.

Thank you for visiting my blog today! Have a good day!

Supplies:
stamp-Curly Cute
papers-crumb cake. whisper white, real red, summer sun, tempting turquoise, certainly celery
ink-chocolate chip
accessories-taffeta ribbon, eyelet border punch, beautiful wings embosslit, elegant bouquet embossing folder

Happy Stamping!
Deanna

Monday, 21 February 2011

How The White Wedding Favour Box Works

Happy Monday everyone! Hope you all had a wonderful weekend. I like Mondays. It is a day that I get to relax from the busy weekends. At least once a month on Saturday there is a birthday party and church on Sundays. My weekends are always booked up.

Someone asked me how the Petal Cone die weeding favour works. So here are some picture of how the box open and close.

Here is how it looks when it is open. The flower is slide to the end of the knotted ribbon. If you don't want the knotted ribbon to show when the box is closed then put it close the opening of the box.


I put one eyelet each onto the two opening flaps (the two with the scallop around them). Ignore the hole on one of the flap. I wasn't too careful when I was Crop-a-dile the hole for the eyelet. I thread the ribbon through the two eyelets but did not tie a knot on the ribbon yet. Set this aside.


Make your flower. I used a cardboard from the DSP packaging for my flower backing. I want it to be strong enough to move along the ribbon for opening and closing the box. I used a Crop-a-dile to punched a hole in the middle of the flower. (While I was writing this I thought it would work best if I had punch two hole in the middle of the flower. This way the flower will slide along the ribbon smoother.) Thread the ribbon through hole of the flower. Next, thread the ribbon through a button. Then glue the button onto the flower.


A closer look a the top of the flower.

Hope you understand my tutorial of this box. If you have any questions just leave a comment here or email me. I'll try my best to answer you.

Thank you for stopping by. Have a great day!

Happy Stamping!
Deanna