supplies:
1" x 4-1/2" designer paper
1-1/4" x 5-1/2" designer paper
1-1/2" x 6-1/2" designer paper
1-3/4" x 7-1/2" designer paper
2" x 8-1/2" designer paper
4-1/2" x 6" Gumball Green card stock
Crumb Cake scrap card stock
button
8" linen thread
Trimmer with a scoring blade
or Simply Scored Scoring Tool for scoring
hot glue gun
pencil
ruler
1. Score all the designer paper pieces at every 1/4" as shown in the photo. Lines drawn in in the photo is for instruction purpose only.
2. Accordion fold the designer paper pieces. Make sure the ends of the designer paper pieces are facing down. Set these aside.
3. Use a pencil and mark 2 lines at 2-1/8" and 2-3/8" on the short side of the card stock.
4. Draw 2 lines as shown in photo. This is the tree base.
5. Cut off the sides.
6. Draw curve lines on the tree base. Starting from the bottom draw a line about 1-5/8" from the bottom edge. Draw the other 4 lines decreasing 1/4" measurement. The lines doesn't need to be perfect. They will be cover up by the designer papers.
7. Starting at the bottom line first and add hot glue to it.
8. Adhere the 2" x 8-1/2" designer paper to the line.
9. Adhere the rest of the designer paper pieces to the tree base.
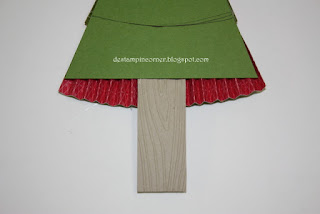
10. Adhere a scrap piece of 1" x 3" Crumb Cake card stock for the tree trunk from the back.
11. Thread a linen thread through the button holes and tie a knot.
12. Turn to the back of the button and add hot glue to the centre of the button.
13. Adhere the button to the top of the tree with hot glue. Embellish the tree. This tree is flat on the back and it shows the Gumball Green card stock.
optional: You can make another set of the designer paper pieces and add it to the back of the tree to hide the back.
You're done! Enjoy making the tree. I love to hear from you and if you make it I love to see it too.
Deanna


No comments:
Post a Comment