This was what Hope did for her classmates for Valentine's Day. I helped her with stamping and she assembled them.
The lollipops was taped to the back of the hearts. Something simple for Hope to do.
Thank you for stopping by! Happy stamping!
Deanna
Showing posts with label Valentine. Show all posts
Monday, 24 February 2014
Valentine Hearts With Lollipops
Labels:
3D Projects,
Big Shot,
Framelits,
Gift Idea,
Valentine
Thursday, 23 January 2014
Candy Stick Box
Hello stampers! Here is a box that holds 4 candy sticks. It is a simple box made from the kraft paper. The paper holds the candies very well. The box measures 3-1/2" wide x 4" long and about 1/2" thick.
This time I adhere hearts to the top of each candy sticks. It adds a nice touch to the candies.
Thank you so much for stopping by today! Happy Stamping!
Deanna
This time I adhere hearts to the top of each candy sticks. It adds a nice touch to the candies.
Thank you so much for stopping by today! Happy Stamping!
Deanna
Labels:
3D Projects,
Gift Idea,
Valentine
Friday, 17 January 2014
Valentine Candy Sticks Pretty Packaging
I bought a bag of Valentine candy sticks and made a pretty little pocket/holder for it. I used the framelit for the shape. Stamped it with a background stamp and then sponge around it.
Added ribbon and flowers to the front of the pocket/holder. It is only big enough to hold 2 candy sticks. I might make a different holder to see if I can put 4 candies in there.
Thank you for visiting today! Happy Stamping!
Deanna
Added ribbon and flowers to the front of the pocket/holder. It is only big enough to hold 2 candy sticks. I might make a different holder to see if I can put 4 candies in there.
Thank you for visiting today! Happy Stamping!
Deanna
Labels:
3D Projects,
Big Shot,
Framelits,
Gift Idea,
Valentine
Monday, 13 January 2014
Valentine Pillow Boxes
Hello stampers! Here is another project I made using the kraft colour card stock. I made 2 boxes out of the Pillow Box Die. I stamped the boxes with the Hearts A Flutter stamp set.
This box was stamped with Soft Suede ink and a red ribbon to tie the box together. I love the sentiment Trust God stamp set for this box. I love the font and what it said on it "God is Love."
This box was stamped with Cherry Cobbler ink and a brown ribbon to tie the box together.
Thank you for visiting today! Happy Stamping!
Deanna
This box was stamped with Soft Suede ink and a red ribbon to tie the box together. I love the sentiment Trust God stamp set for this box. I love the font and what it said on it "God is Love."
This box was stamped with Cherry Cobbler ink and a brown ribbon to tie the box together.
Thank you for visiting today! Happy Stamping!
"He that loveth not knoweth not God; for God is love."
1 John 4:8
Deanna
Labels:
3D Projects,
Big Shot,
Gift Box,
Pillow Box,
Valentine
Saturday, 11 January 2014
Valentine Trio Milk Carton Boxes
Hello stampers! I'm making use of the kraft colour card stocks a friend gave to me. I made 3 different Valentine milk carton boxes. I added some reds to each boxes for some colour.
This one was stamped with 2 hearts on the 4 sides of the box.
I can't seem to remember the name of the embossing folder I use for this box. No sentiment on this box.
This one was embossed with the Vintage Wallpaper Embossing Folder. The embossed part was sponge with Cherry Cobbler ink to add some colour.
Thank you for stopping by! Happy Stamping!
Deanna
This one was stamped with 2 hearts on the 4 sides of the box.
I can't seem to remember the name of the embossing folder I use for this box. No sentiment on this box.
This one was embossed with the Vintage Wallpaper Embossing Folder. The embossed part was sponge with Cherry Cobbler ink to add some colour.
Thank you for stopping by! Happy Stamping!
"We love him, because he first loved us."
1 John 4:19
Deanna
Labels:
3D Projects,
Big Shot,
Embossing Folder,
Gift Idea,
Milk Carton,
Valentine
Monday, 30 December 2013
Hanging Valentine Hearts
Hello stampers! Happy New Year! I feel a lot better from the car accident. Thank you for praying for me. I don't have constant headache, neck or back pain anymore. Still have pain but I can bear little pain. Physiotherapy really helps. I still can't look down too long. Makes my neck hurt.
Since I missed creating projects for Christmas I thought I start making Valentine projects early for the new year. I took it easy making it since I'm not 100% well yet. Rest when needed.
I made hanging hearts on strings. It would be nice to hang these around the house. I die cut all the pink and red papers I have using the Hearts Collection Framelits Die.
I sewed the hearts together instead of gluing them together. I want them to flutter out to make them 3D like.
Top view of the sewn hearts.
These are the little hearts at the bottom of each heart strings. These tally ties the hanging hearts together.
Thank you so much for stopping by! Happy creating!
Deanna
Since I missed creating projects for Christmas I thought I start making Valentine projects early for the new year. I took it easy making it since I'm not 100% well yet. Rest when needed.
I made hanging hearts on strings. It would be nice to hang these around the house. I die cut all the pink and red papers I have using the Hearts Collection Framelits Die.
After I die cut all the hearts I fold them in half and then sew them together. Each hearts has 6 pieces of hearts sewn together. I put three sets of hearts together and then tape them onto a string.
I sewed the hearts together instead of gluing them together. I want them to flutter out to make them 3D like.
Top view of the sewn hearts.
These are the little hearts at the bottom of each heart strings. These tally ties the hanging hearts together.
Thank you so much for stopping by! Happy creating!
Deanna
Labels:
3D Projects,
Big Shot,
Framelits,
Valentine
Monday, 14 January 2013
Money Envelope Tutorial
Thought some of you might like to make the money envelope I've been talking during Christmas. I made this a Valentine one.
I use card stock for the tutorial. Pattern paper is too busy to see the score lines. You are welcome to use pattern paper when you make yours.
1.Cut a piece of card stock at 7-1/2" x 8-1/2". On the 7-1/2" side score at 3-1/2" and at 7". Rotate the paper counter clockwise. On the 8-1/2" side score at 1-1/4" and at 8". The lines are drawn in in the photo are for instruction purpose only.
2.Cut off the pieces as shown in the photo. Discard the cut out pieces. You'll have 1/2" flap at the bottom and the side and 1-1/4" flap for the opening.
3.Trim slightly on the part without the flaps for easy folding.
4.Stamp the envelope before assembling if using card stock or leave it plain.
5.Punch half a circle at the top on the part without the flap. This help for easy access of stuff out of the envelope.
6.Use a corner rounder punch and round off the corners on the 1-1/4" flap.
7.Turn the paper to the inside and add sticky strip to the 1/2" flaps at the bottom and side.
8.Adhere the envelope together.
9.For the closure of the flap at the top, I stamp a scallop circle image and mount it onto envelope but not onto the flap.
10.Decorate the front of the envelope.
You can put money in the envelope or
Add some candies to it.
Hope you enjoy the tutorial. Tell me what you think.
Deanna
Monday, 20 February 2012
Valentine Milk Carton Favours
Good day stampers. Last week I made some milk carton favours for my kids to give to their friends at church. My Pastor and his wife watched our children and other couple's children so that we can go out on a date on Valentine's Day. What a blessing they are! My youngest (5 years old) was in charge of making sure every kids get one. She did a great job at it and love doing it too.
My first time using Stampin'Up! Milk Carton die. Had it for awhile but could not think of what to do with it. I filled each carton with Maynard's candies. They kids all loved the favour boxes and the candies of course.
Thank you for stopping by!
My first time using Stampin'Up! Milk Carton die. Had it for awhile but could not think of what to do with it. I filled each carton with Maynard's candies. They kids all loved the favour boxes and the candies of course.
Thank you for stopping by!
"Give, and it shall be given unto you; ..."
Luke 6:38
Deanna
Labels:
3D Projects,
Big Shot,
Valentine
Thursday, 9 February 2012
Valentine Diaper Folding Pouches
Good day everyone! Welcome to rainy Vancouver. I'm glad to be inside with my kiddies while they do school work. Being a stay-at-home mom is so great. Although my youngest is taking forever to do her school work. She talks more than do her work so 2 hours of work end up to be 4 hours. Gotta love her though. She's the entertainer of our home. Our house would've been very quiet if it wasn't for her. Most of the stuff she says are funny.
Well, onto my creations for today. I made two diaper fold pouches for Valentine but they can be for any occasions. I used a 6" x 6" designer paper to make the pouch.
The pouches are mounted on the rosettes or accordion flowers. You can see the tutorial here on how to make the flower.
I added a flower to the front of each pouches. The flower is the new Blossom punch in the Occasion Mini.
I was able to fit two little heart cookies inside each pouches. I might make some of these for my kiddies to give to their friends if time permits. They will be filled with candies instead.
Thank you for stopping by!
Deanna
Well, onto my creations for today. I made two diaper fold pouches for Valentine but they can be for any occasions. I used a 6" x 6" designer paper to make the pouch.
The pouches are mounted on the rosettes or accordion flowers. You can see the tutorial here on how to make the flower.
I added a flower to the front of each pouches. The flower is the new Blossom punch in the Occasion Mini.
I was able to fit two little heart cookies inside each pouches. I might make some of these for my kiddies to give to their friends if time permits. They will be filled with candies instead.
Thank you for stopping by!
"Jesus said unto him, Thou shalt love the Lord thy God with all thy heart,
and with all thy soul, and with all thy mind."
Matthew 22:37
Deanna
Labels:
3D Projects,
Paper Flowers,
Valentine
Tuesday, 24 January 2012
Valentine Heart Treat Box and Card Tutorial
Today is my birthday. Since it is a special day I thought I share a FREE tutorial with you. I finally finish it. It is very lengthy. Hope you like it.
I use the Petal Cone Die die cut pieces to make the box. Sorry, I don't have a template for this box.
Materials:
(4) 4-1/4" x 5-1/2" card stock
1-1/2" x 9-1/2" card stock
1-1/2" x 9 card stock
Stamp
Petal Cone Die
Big Shot Die Cutting Machine
Paper Trimmer with Scoring Blade
12" Ribbon
Slot Punch or Crop-A-Dile
Sticky Strip
1.Die cut the (4) 4-1/4" x 5-1/2" card stock using the Petal Cone die. Picture above shows the pieces you'll need for this project. Set the 1 petal piece, the 2 half scallop circles and the banner aside.
2.Cut off the flaps of 3 of the petal cone die pieces. Set one petal piece aside.
3.Draw a line about 1/4" from edge all around one of the petal piece using a ruler and pencil.
4.Cut around the drawn line. This will be the inside of the box base.
5.Use the inside box base and lightly trace around onto another petal piece. This will be the box base. Set aside.
6.Stamp the 1-1/2" x 9-1/2" card stock and the 1-1/2" x 9 card stock pieces. These will be the box sides.
7.Score 1/2" on the long side of both pieces and 1/2" on the short side for both ends of the longer piece. The 1/2" scored parts will be the flaps for assembling the box.
8.Add sticky strip on the flaps of both pieces of card stock. Cut the corners of the longer pieces as shown in picture above.
9.Working with the longer piece of card stock first. With the flap at the bottom, lay the card stock onto a ruler, starting cutting on the flap part at 4" and then cut every 1/4" after that all way to the other end of the card stock. The picture shows the cutting point.
10.Now work with the shorter piece of card stock. With the sticky strip at the top, lay the card stock onto a ruler, starting cutting on the flap part at 4" and then cut every 1/4" after that all way to the other end of the card stock.
11.This is how the 2 card stock looks like when you finish cutting the flaps.
12.Join the ends together making sure the 4" parts meet and the parts with the little 1/4" flaps meet. Snip at an angle on the part where the end of both 4" part meets.
13.This is how the box side looks like after they are joined. The "V" part will be the bottom of the box and the rounded part is the top of the box.
14.Punch a hole about 3" up from the bottom "V" of the box side using the Slot punch or the Crop-A-Dile before assembling the box side to the box base. The picture show the side already assemble to the base but it is harder to punch a hole this way. Trust me I know. It is easier to punch a hole before assembling the side to the base.
15.Assemble the box sides at the "V" first up to before the heart curves.
16.This is how the box side looks like after assembling the "V" part.
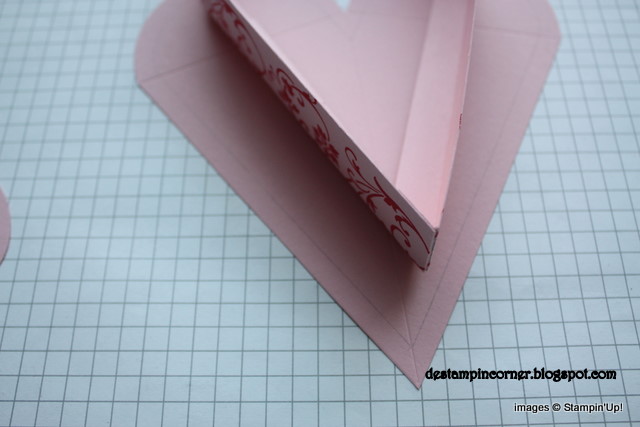
17.Now assemble the top of the box. Stick down the part where the 2 pieces of card stock meets first and then work with the 1/4" flaps pieces last.
18.Cover the inside of the box with the inside box base piece that was work on earlier. Now you have a heart box. Set aside.
19.Now take the last petal piece and emboss it or stamp on it. I emboss mine. You can see the stamped one here.
20.Add sticky strip on the other side of the flap.
21.Adhere the embossed or stamped petal piece onto the petal piece with the flap cut off earlier.
22.Open up the joined petal pieces and stamped the inside. This will the card and lid of the box.
23.Cut the banner in half, score about 1" on both pieces and then add sticky strips.
24.Adhere the 2 banner pieces onto the back side of the card as shown in picture above.
25.Adhere the lid to the box. Make sure everything is line up.
26.Punch holes on the lid.
27.Tie the 12" ribbon through the hole and decorate the box. Enjoy!
I use the Petal Cone Die die cut pieces to make the box. Sorry, I don't have a template for this box.
Valentine Heart Treat Box and Card Tutorial
Materials:
(4) 4-1/4" x 5-1/2" card stock
1-1/2" x 9-1/2" card stock
1-1/2" x 9 card stock
Stamp
Petal Cone Die
Big Shot Die Cutting Machine
Paper Trimmer with Scoring Blade
12" Ribbon
Slot Punch or Crop-A-Dile
Sticky Strip
1.Die cut the (4) 4-1/4" x 5-1/2" card stock using the Petal Cone die. Picture above shows the pieces you'll need for this project. Set the 1 petal piece, the 2 half scallop circles and the banner aside.
2.Cut off the flaps of 3 of the petal cone die pieces. Set one petal piece aside.
3.Draw a line about 1/4" from edge all around one of the petal piece using a ruler and pencil.
4.Cut around the drawn line. This will be the inside of the box base.
5.Use the inside box base and lightly trace around onto another petal piece. This will be the box base. Set aside.
6.Stamp the 1-1/2" x 9-1/2" card stock and the 1-1/2" x 9 card stock pieces. These will be the box sides.
7.Score 1/2" on the long side of both pieces and 1/2" on the short side for both ends of the longer piece. The 1/2" scored parts will be the flaps for assembling the box.
8.Add sticky strip on the flaps of both pieces of card stock. Cut the corners of the longer pieces as shown in picture above.
10.Now work with the shorter piece of card stock. With the sticky strip at the top, lay the card stock onto a ruler, starting cutting on the flap part at 4" and then cut every 1/4" after that all way to the other end of the card stock.
11.This is how the 2 card stock looks like when you finish cutting the flaps.
12.Join the ends together making sure the 4" parts meet and the parts with the little 1/4" flaps meet. Snip at an angle on the part where the end of both 4" part meets.
13.This is how the box side looks like after they are joined. The "V" part will be the bottom of the box and the rounded part is the top of the box.
14.Punch a hole about 3" up from the bottom "V" of the box side using the Slot punch or the Crop-A-Dile before assembling the box side to the box base. The picture show the side already assemble to the base but it is harder to punch a hole this way. Trust me I know. It is easier to punch a hole before assembling the side to the base.
15.Assemble the box sides at the "V" first up to before the heart curves.
16.This is how the box side looks like after assembling the "V" part.
17.Now assemble the top of the box. Stick down the part where the 2 pieces of card stock meets first and then work with the 1/4" flaps pieces last.
18.Cover the inside of the box with the inside box base piece that was work on earlier. Now you have a heart box. Set aside.
19.Now take the last petal piece and emboss it or stamp on it. I emboss mine. You can see the stamped one here.
20.Add sticky strip on the other side of the flap.
21.Adhere the embossed or stamped petal piece onto the petal piece with the flap cut off earlier.
22.Open up the joined petal pieces and stamped the inside. This will the card and lid of the box.
24.Adhere the 2 banner pieces onto the back side of the card as shown in picture above.
25.Adhere the lid to the box. Make sure everything is line up.
26.Punch holes on the lid.
27.Tie the 12" ribbon through the hole and decorate the box. Enjoy!
"And now abideth faith, hope, charity, these three; but the greatest of these is charity."
1 Corinthians 13;13
Deanna
Subscribe to:
Posts (Atom)